
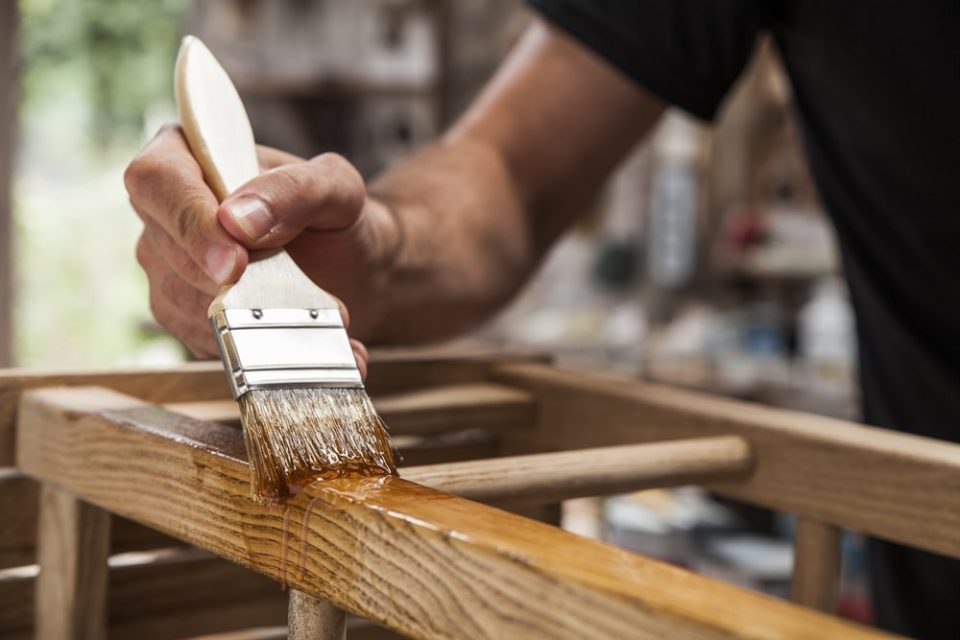
Thrift stores, estate sales, and flea markets are treasure troves for high-quality, solid wood furniture. Older pieces were built to last, often featuring superior craftsmanship, dovetail drawers, and real wood construction that is difficult to find or incredibly expensive in modern retail stores. However, these secondhand finds frequently suffer from decades of wear, outdated finishes, scratches, and structural minor damages.
Restoring and painting thrifted furniture is a rewarding way to create bespoke, high-end pieces for your home on a budget. It allows you to save durable materials from landfills while customizing the color, texture, and hardware to match your personal design aesthetic. Transforming a worn-out piece requires more than just brushing on a fresh coat of paint. To achieve a professional, durable finish that resists chipping and scratching, you must follow a systematic process of cleaning, repairing, prepping, and sealing. This comprehensive guide walks you through every essential step of the furniture transformation journey.
Evaluating and Selecting the Right Thrifted Pieces
Not every piece of secondhand furniture is a good candidate for restoration. Before spending your money, you must inspect the structural integrity of the item to ensure it is worth your time and effort.
Solid Wood versus Manufactured Materials
Look closely at the edges and back panels of the furniture. Solid wood pieces exhibit natural grain variations and are heavy and sturdy. If you see exposed particleboard, medium-density fiberboard, or plastic laminate on the edges, the piece is made of manufactured materials. While you can paint laminate and veneer, real wood is significantly more forgiving, easier to sand, and holds paint and stain much better over the long term.
Checking for Structural Damage
Test the stability of the piece by giving it a gentle shake. Loose joints can often be fixed with wood glue and clamps, but severely warped frames or widespread wood rot can be incredibly difficult to correct. Pull out every drawer to ensure they slide smoothly along their tracks. Inspect the wood thoroughly for tiny, pin-sized holes, which can indicate an active woodworm or termite infestation that you absolutely do not want to introduce into your home.
Preparing Your Workspace and Toolkit
Preparation is the absolute foundation of a professional paint job. Gathering the proper tools before you begin ensures a smooth workflow and prevents mid-project frustration.
-
Cleaning Supplies: Trisodium phosphate alternative, heavy-duty degreaser, microfiber cloths, and scrubbing sponges.
-
Safety Gear: Nitrile gloves, safety goggles, and a high-quality dust mask or respirator for sanding and chemical stripping.
-
Sanding Tools: An orbital sander for large flat surfaces, hand-sanding blocks for tight corners, and sandpaper sheets ranging from 120-grit to 220-grit.
-
Repair Materials: High-quality wood filler or two-part epoxy putty, a putty knife, and wood glue.
-
Applicators: High-quality synthetic bristle brushes, a microfiber foam roller for large surfaces, or a paint sprayer for a flawless finish.
The Crucial Prep Work: Cleaning, Repairing, and Sanding
Skipping the preparation phase is the most common reason DIY furniture projects fail. Paint requires a clean, stable, and slightly porous surface to adhere correctly.
Deep Cleaning the Surface
Thrifted furniture often carries a heavy buildup of body oils, furniture wax, polish, nicotine stains, and accumulated dirt. Spray the entire piece down with a diluted trisodium phosphate alternative or a strong kitchen degreaser. Scrub the surface thoroughly with a coarse sponge, then wipe it down multiple times with clean water to remove any soapy residue. Allow the wood to dry completely before moving to the next step.
Repairing Imperfections
Examine the piece for deep gouges, scratches, or missing chunks of veneer. Use a putty knife to press wood filler or two-part epoxy putty firmly into the damaged areas, leaving it slightly overfilled to account for shrinkage as it dries. Once the filler cures completely according to the manufacturer instructions, sand it perfectly flush with the surrounding wood surface. If any joints or decorative molding pieces are loose, apply wood glue, clamp them tightly, and let them cure overnight.
Sanding for Adhesion
You do not necessarily need to strip the old finish down to raw wood unless you plan to apply a light stain. However, you must perform a scuff sand to remove the glossy sheen of the old varnish or lacquer. Use 150-grit sandpaper over the entire piece to create microscopic scratches, which give the new primer and paint something to grip onto mechanically. Once finished, use a vacuum attachment and a damp microfiber cloth to remove every trace of sanding dust.
Priming and Choosing the Right Paint System
Priming acts as an insurance policy for your hard work. It blocks old wood tannins from bleeding through your new paint, prevents stains, and ensures uniform color coverage.
Selecting the Right Primer
Oil-based or shellac-based primers are highly recommended for thrifted furniture restoration. Mahogany, oak, and pine are notorious for bleeding red tannins or yellow knot oils through fresh paint, especially if you are using a light paint color. Water-based primers often fail to block these oil-soluble tannins, resulting in unsightly yellow or pink stains bleeding through your final finish weeks after completion. Apply one to two coats of shellac-based primer, sanding lightly with 220-grit sandpaper between coats for ultimate smoothness.
Choosing Your Paint Type
-
Chalk-Style Paint: Highly popular for its excellent coverage and matte, velvety finish. It requires minimal prep work but must be sealed with wax or a topcoat because it is highly porous and absorbs oils easily.
-
Acrylic Milk Paint: Creates a beautiful, authentic vintage look that can chip naturally over old finishes for a distressed aesthetic, or can be mixed with a bonding agent for a smooth, modern look.
-
Urethane Alkyd Enamel: The premier choice for a smooth, factory-like finish. This paint self-levels beautifully, meaning brush strokes disappear as it dries. Once fully cured, it forms an exceptionally hard, durable shell that is highly resistant to daily wear and scrubbing.
Execution: Flawless Paint Application Techniques
When applying your paint, patience and technique are far more important than speed. Multiple thin coats will always yield a more durable and professional finish than one or two thick, heavy coats.
If you are using a paintbrush, work in the direction of the natural wood grain. Maintain a wet edge by overlapping each stroke slightly with the previous one, and avoid going back over paint that has already begun to tack up and dry, as this creates permanent texture and brush marks. For large flat areas like tabletops or dresser sides, use a high-density foam roller to apply the paint quickly, then immediately skim the surface lightly with a dry paintbrush to pop any tiny air bubbles left by the roller.
Allow each coat of paint to dry completely according to the specific product guidelines. For an ultra-smooth finish, run a piece of 220-grit sandpaper or a brown paper grocery bag very lightly over the dried paint surface between coats to knock down any dust nibs or minor imperfections, wiping clean before applying the next layer. Two to three coats are typically required for complete opacity and deep color depth.
Sealing and Protecting Your Masterpiece
The final step is protecting your beautiful new finish from moisture, scratches, and daily household use. Without a proper topcoat, your painted furniture will quickly show signs of wear and tear.
Water-Based Polyurethane versus Polycrylic
For most painted furniture, a water-based polycrylic or polyurethane topcoat is ideal. Unlike oil-based varnishes, which dry to an amber or yellowish tint over time, water-based clear coats remain perfectly crystal clear, preserving the true color of your paint. Apply the topcoat in two to three thin layers using a high-quality synthetic brush or a foam applicator.
Furniture Wax
If you used chalk paint and desire a soft, low-sheen satin finish, furniture wax is an excellent traditional option. Apply a clear paste wax using a stiff wax brush or a lint-free rag, working it into the paint in circular motions. Buff the surface with a clean microfiber cloth after it dries to achieve a beautiful, subtle gleam. Keep in mind that waxed surfaces require reapplication every year or two and do not handle heavy moisture or heat well, making them poor choices for kitchen tables or bathroom vanities.
Frequently Asked Questions
How long does painted furniture take to dry versus cure completely?
Dry time refers to when the surface feels dry to the touch, usually within a few hours. Curing time is the period required for the paint to achieve its maximum structural hardness and chemical resistance. Most modern enamel and acrylic furniture paints take roughly twenty to thirty days to cure completely. Handle the furniture with extreme care during this initial month, avoiding heavy objects or vigorous cleaning.
Can I paint over a piece of furniture that has old hardware holes I do not want to use?
Yes. If you are changing the size or style of the hardware handles, fill the original holes completely with a two-part epoxy wood putty or high-quality wood filler during the repair phase. Pack the filler tightly into the hole, let it dry completely, and sand it flush with the wood surface. You can then prime, paint, and drill entirely new holes for your updated hardware.
What should I do if the paint starts bubbling or peeling off immediately after application?
Peeling or bubbling indicates a severe lack of surface adhesion, usually caused by hidden oils, wax, or moisture trapped underneath the paint layer. You will need to scrape away the failed, peeling paint from the affected areas, sand the edges smooth down to a stable base layer, clean the area thoroughly with a degreaser, apply a shellac-based primer, and repaint.
Is it necessary to remove the drawers and doors before painting a dresser or cabinet?
Yes, you should always disassemble the piece as much as possible before painting. Take off all doors, drawers, hinges, and handles. Painting over hardware ruins the clean lines, while painting drawers while they are inside the frame will cause the paint to seal the drawers shut or scrape off immediately along the contact edges when opened.
How do I identify if the old finish on my thrifted piece contains hazardous lead paint?
If the furniture piece was manufactured before 1978, there is a distinct possibility it contains lead-based paint or varnish. Before sanding or disturbing the old finish, purchase a simple, inexpensive lead testing kit from your local hardware store. Swab the surface according to the instructions. If it tests positive, you must use chemical wet-stripping methods and wear an approved respirator rather than dry sanding, which releases toxic lead dust into the air.
Can I use standard wall paint left over from my home projects on furniture?
Standard latex wall paint is not formulated for the heavy handling, impact, and friction that furniture experiences. Latex paint remains relatively soft and flexible even when fully cured, leading to a sticky phenomenon called blocking, where objects placed on the surface stick to it and peel the paint away. Stick to paints specifically formulated for cabinets, trim, or furniture restoration.